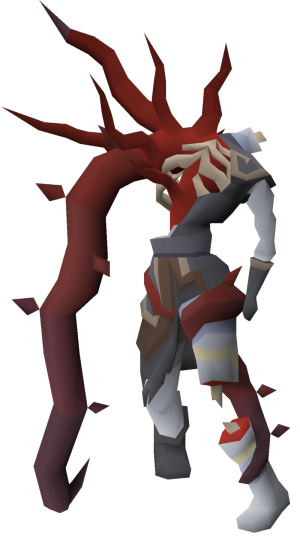
Vardorvis: Difference between revisions
Appearance
No edit summary |
No edit summary |
||
| (14 intermediate revisions by the same user not shown) | |||
| Line 1: | Line 1: | ||
'''[[Vardorvis Boss Guide]]''' | <div style="display: flex; align-items: flex-start; gap: 20px;"> | ||
<div style="flex: 1; min-width: 0;"> | |||
== '''Click Here--> [[Vardorvis Boss Guide]]''' == | |||
<blockquote>Vardorvis can be accessed through the '''[[Teleport Interface]]''' with no prior requirements. | <blockquote>Vardorvis can be accessed through the '''[[Teleport Interface]]''' with no prior requirements. | ||
| Line 6: | Line 7: | ||
It is recommended to use '''mid-tier gear''' for an optimal fight experience.</blockquote> | It is recommended to use '''mid-tier gear''' for an optimal fight experience.</blockquote> | ||
== Vardorvis - Boss Stats == | |||
{| class="wikitable" | {| class="wikitable" | ||
!'''Stat''' | !'''Stat''' | ||
!'''Value''' | !'''Value''' | ||
| Line 48: | Line 50: | ||
|💀🚫 | |💀🚫 | ||
|} | |} | ||
== ⚔️ Combat Stats == | |||
{| class="wikitable" | {| class="wikitable" | ||
!'''Stat''' | !'''Stat''' | ||
!'''Value''' | !'''Value''' | ||
| Line 78: | Line 81: | ||
|❤️ | |❤️ | ||
|} | |} | ||
== 💥 Attack Bonuses == | |||
{| class="wikitable" | {| class="wikitable" | ||
!'''Bonus Type''' | !'''Bonus Type''' | ||
!'''Value''' | !'''Value''' | ||
| Line 108: | Line 112: | ||
|🎯💪 | |🎯💪 | ||
|} | |} | ||
== 🛡️ Defensive Bonuses == | |||
{| class="wikitable" | {| class="wikitable" | ||
!'''Bonus Type''' | !'''Bonus Type''' | ||
!'''Value''' | !'''Value''' | ||
| Line 134: | Line 139: | ||
|💪 | |💪 | ||
|} | |} | ||
</div> | |||
<div style="flex: 0 0 300px; text-align: center;"> | |||
[[File:Vardorvis.png|300px|center|'''Vardorvis''']] | |||
</div> | |||
</div> | |||
[[Category:Bosses]] | [[Category:Bosses]] | ||
Latest revision as of 17:43, 21 May 2025
Click Here--> Vardorvis Boss Guide
Vardorvis can be accessed through the Teleport Interface with no prior requirements.
Players must defeat Vardorvis 10 times to unlock access to other bosses.
It is recommended to use mid-tier gear for an optimal fight experience.
Vardorvis - Boss Stats
| Stat | Value | Icon |
|---|---|---|
| 🕒 Attack Speed | 2 ticks | ⏳ |
| ⚔️ Slayer Level | 0 | 🏹 |
| 🎯 Attack Style | Special | 🔥 |
| 👹 Aggressive | Yes | 💀 |
| 💀 Poisonous | No | 🚫💀 |
| 💉 Immune to Poison | No | 🧪🚫 |
| 💉 Immune to Venom | No | 🐍🚫 |
| 💥 Immune to Cannons | No | 💣🚫 |
| 👻 Immune to Thralls | No | 💀🚫 |
⚔️ Combat Stats
| Stat | Value | Icon |
|---|---|---|
| 🔮 Magic | 1 | 🧙♂️ |
| ⚔️ Attack | 200 | 🏹 |
| 🛡️ Defence | 200 | 🦸♂️ |
| 🏹 Range | 1 | 🎯 |
| 💪 Strength | 200 | 💥 |
| ❤️ Hitpoints | 5000 | ❤️ |
💥 Attack Bonuses
| Bonus Type | Value | Icon |
|---|---|---|
| 🔮 Magic Attack Bonus | 0 | 🧙♂️✨ |
| ⚔️ Attack Bonus | 320 | 💪🔨 |
| 💪 Strength Bonus | 200 | 💥 |
| 🔮 Magic Strength Bonus | 0 | 🧙♂️⚡ |
| 🏹 Range Attack Bonus | 360 | 🎯 |
| 🏹 Range Strength Bonus | 0 | 🎯💪 |
🛡️ Defensive Bonuses
| Bonus Type | Value | Icon |
|---|---|---|
| ⚔️ Slash Bonus | 300 | ⚔️ |
| 🔪 Stab Bonus | 650 | 🗡️ |
| 🏹 Range Bonus | 0 | 🎯 |
| 🔮 Magic Bonus | 0 | 🧙♂️✨ |
| 💥 Crush Bonus | 300 | 💪 |
