Bosses: Difference between revisions
No edit summary |
No edit summary |
||
| Line 7: | Line 7: | ||
<!-- Left Column --> | <!-- Left Column --> | ||
<div style="flex: 1; min-width: 0; text-align: left;"> | <div style="flex: 1; min-width: 0; text-align: left;"> | ||
<div style="border: 1px solid #ccc; padding: 10px; margin-bottom: 20px; box-shadow: 2px 2px 5px #ddd; transition: box-shadow 0.3s; height: 220px; display: flex; flex-direction: column; justify-content: center;"> | |||
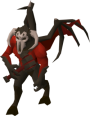
* [[Xamphur]]<br /> | * [[Xamphur]]<br /> | ||
[[File:Xamphur_small.png|121x121px|center|alt=Xamphur Image|link= Xamphur]]< | [[File:Xamphur_small.png|121x121px|center|alt=Xamphur Image|link=Xamphur]] | ||
</div> | |||
<div style="border: 1px solid #ccc; padding: 10px; margin-bottom: 20px; box-shadow: 2px 2px 5px #ddd; transition: box-shadow 0.3s; height: 220px; display: flex; flex-direction: column; justify-content: center;"> | |||
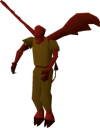
* [[Judge Of Yama]]<br /> | * [[Judge Of Yama]]<br /> | ||
[[File:JudgeOfYama_small.png|116x116px|center|alt=Judge Of Yama Image|link=Judge Of Yama]]< | [[File:JudgeOfYama_small.png|116x116px|center|alt=Judge Of Yama Image|link=Judge Of Yama]] | ||
</div> | |||
<div style="border: 1px solid #ccc; padding: 10px; margin-bottom: 20px; box-shadow: 2px 2px 5px #ddd; transition: box-shadow 0.3s; height: 220px; display: flex; flex-direction: column; justify-content: center;"> | |||
* [[Tumekens Warden|Tumeken's Warden]]<br /> | * [[Tumekens Warden|Tumeken's Warden]]<br /> | ||
[[File:TumekensWarden_small.png|109x109px|center|alt=Tumeken's Warden Image|link=Tumekens Warden]]< | [[File:TumekensWarden_small.png|109x109px|center|alt=Tumeken's Warden Image|link=Tumekens Warden]] | ||
</div> | |||
</div> | </div> | ||
<!-- Middle Column --> | <!-- Middle Column --> | ||
<div style="flex: 1; min-width: 0; text-align: center;"> | <div style="flex: 1; min-width: 0; text-align: center;"> | ||
<div style="border: 1px solid #ccc; padding: 10px; margin-bottom: 20px; box-shadow: 2px 2px 5px #ddd; transition: box-shadow 0.3s; height: 220px; display: flex; flex-direction: column; justify-content: center;"> | |||
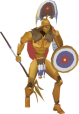
* [[Sol Heredit]]<br /> | * [[Sol Heredit]]<br /> | ||
[[File:SolHeredit_small.png|114x114px|center|alt=Sol Heredit Image|link=Sol Heredit]]< | [[File:SolHeredit_small.png|114x114px|center|alt=Sol Heredit Image|link=Sol Heredit]] | ||
</div> | |||
<div style="border: 1px solid #ccc; padding: 10px; margin-bottom: 20px; box-shadow: 2px 2px 5px #ddd; transition: box-shadow 0.3s; height: 220px; display: flex; flex-direction: column; justify-content: center;"> | |||
* [[Chaotic Death Spawn]]<br /> | * [[Chaotic Death Spawn]]<br /> | ||
[[File:ChaoticDeathSpawn_small.png|128x128px|center|alt=Chaotic Death Spawn Image|link=Chaotic Death Spawn]]< | [[File:ChaoticDeathSpawn_small.png|128x128px|center|alt=Chaotic Death Spawn Image|link=Chaotic Death Spawn]] | ||
</div> | |||
<div style="border: 1px solid #ccc; padding: 10px; margin-bottom: 20px; box-shadow: 2px 2px 5px #ddd; transition: box-shadow 0.3s; height: 220px; display: flex; flex-direction: column; justify-content: center;"> | |||
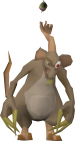
* [[Phantom Ba-Ba]]<br /> | * [[Phantom Ba-Ba]]<br /> | ||
[[File:PhantomBaBa_small.png|100x100px|center|alt=Phantom Ba-Ba Image|link=Phantom Ba-Ba]]< | [[File:PhantomBaBa_small.png|100x100px|center|alt=Phantom Ba-Ba Image|link=Phantom Ba-Ba]] | ||
</div> | |||
</div> | </div> | ||
<!-- Right Column --> | <!-- Right Column --> | ||
<div style="flex: 1; min-width: 0; text-align: right;"> | <div style="flex: 1; min-width: 0; text-align: right;"> | ||
<div style="border: 1px solid #ccc; padding: 10px; margin-bottom: 20px; box-shadow: 2px 2px 5px #ddd; transition: box-shadow 0.3s; height: 220px; display: flex; flex-direction: column; justify-content: center;"> | |||
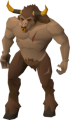
* [[Minotaur]]<br /> | * [[Minotaur]]<br /> | ||
[[File:Minotaur.png|121x121px|center|alt=Minotaur Image|link=Minotaur]]< | [[File:Minotaur.png|121x121px|center|alt=Minotaur Image|link=Minotaur]] | ||
</div> | |||
<div style="border: 1px solid #ccc; padding: 10px; margin-bottom: 20px; box-shadow: 2px 2px 5px #ddd; transition: box-shadow 0.3s; height: 220px; display: flex; flex-direction: column; justify-content: center;"> | |||
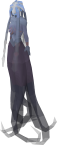
* [[The Whisperer]]<br /> | * [[The Whisperer]]<br /> | ||
[[File:The Whisperer.png|147x147px|center|alt=The Whisperer Image|link=The Whisperer]]< | [[File:The Whisperer.png|147x147px|center|alt=The Whisperer Image|link=The Whisperer]] | ||
</div> | |||
<div style="border: 1px solid #ccc; padding: 10px; margin-bottom: 20px; box-shadow: 2px 2px 5px #ddd; transition: box-shadow 0.3s; height: 220px; display: flex; flex-direction: column; justify-content: center;"> | |||
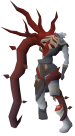
* [[Vardorvis]]<br /> | * [[Vardorvis]]<br /> | ||
[[File:Vardorvis.png|137x137px|center|alt=Vardorvis Image|link=Vardorvis]]< | [[File:Vardorvis.png|137x137px|center|alt=Vardorvis Image|link=Vardorvis]] | ||
</div> | |||
<div style="border: 1px solid #ccc; padding: 10px; margin-bottom: 20px; box-shadow: 2px 2px 5px #ddd; transition: box-shadow 0.3s; height: 220px; display: flex; flex-direction: column; justify-content: center;"> | |||
* [[Vote Boss]]<br /> | * [[Vote Boss]]<br /> | ||
[[File:VoteBoss.png|142x142px|center|alt=Vote Boss Image|link=Vote Boss]]< | [[File:VoteBoss.png|142x142px|center|alt=Vote Boss Image|link=Vote Boss]] | ||
</div> | |||
</div> | </div> | ||
Revision as of 08:36, 21 May 2025
In every boss page refer to " ------> click here " to redirect to the guide, first page shows boss details.